Introduction
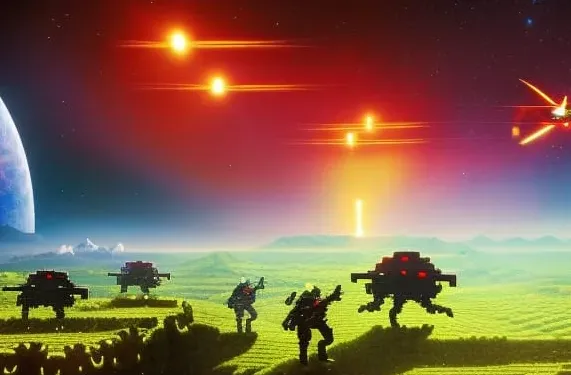
Space Invaders is a classic arcade game that was released in 1978. It is one of the most influential and popular video games of all time. The game involves shooting down alien invaders before they reach your spaceship at the bottom of the screen. In this blog post, you will learn how to create your own version of the Space Invaders Game with Python and Pygame( a library for game development in Python).
What You Need
To follow along with this tutorial, you will need:
- Python 3 installed on your computer. You can download it from here.
- Pygame installed on your computer. You can install it using pip, a package manager for Python. To do that, open your terminal or command prompt and type:
pip install pygame
- A code editor of your choice. You can use any editor that supports Python, such as VS Code, PyCharm, or Sublime Text.
- Some images and sounds for the game. You can download them from here.
How to Create the Game
To create the game, you will need to follow these steps:
- Import the required modules and initialize Pygame.
- Create the game window and set the title and icon.
- Load the images and sounds for the game.
- Define some variables and constants for the game logic.
- Create a function to draw the score on the screen.
- Create a function to check if a collision has occurred between two objects.
- Create a function to display the game over message on the screen.
- Create an infinite loop to run the game until the user quits.
- Inside the loop, handle the user input and update the game state.
- Inside the loop, draw the game objects on the screen and play the sounds.
- Inside the loop, check if the game is over and display the message if it is.
The Code Explained
Let’s go through each step of the code and see how it works.
Step 1: Import the required modules and initialize Pygame.
The first thing we need to do is import some modules that we will use in our game. We will import math, random, pygame, and mixer.
import math
import random
import pygame
from pygame import mixer
The math module provides us with some mathematical functions, such as sqrt and pow, that we will use to calculate the distance between two objects.
The random module provides us with some functions to generate random numbers, such as randint and choice, that we will use to place the invaders randomly on the screen and make them shoot randomly.
The pygame module provides us with all the tools we need to create a game in Python, such as creating a window, loading images and sounds, handling events, drawing shapes and sprites, etc.
The mixer module is a part of pygame that allows us to load and play sounds in our game.
After importing the modules, we need to initialize pygame using pygame.init(). This will set up all the pygame modules for us.
pygame.init()
Step 2: Create the game window and set the title and icon.
Next, we need to create a window where we will display our game. We can do that using pygame.display.set_mode(), which takes a tuple as an argument representing the width and height of the window in pixels. We will store this window in a variable called screen.
screen = pygame.display.set_mode((800, 600))
We also need to set a title and an icon for our window. We can do that using pygame.display.set_caption() and pygame.display.set_icon(), which take strings and images as arguments respectively.
pygame.display.set_caption("Space Invaders")
icon = pygame.image.load("ufo.png")
pygame.display.set_icon(icon)
We have loaded an image called ufo.png from our folder using pygame.image.load(), which returns a Surface object that represents an image in pygame. We have stored this image in a variable called icon and passed it to pygame.display.set_icon().
Step 3: Load the images and sounds for the game.
Now that we have created our window, we need to load some images and sounds that we will use in our game. We will load four images: one for our spaceship, one for our bullet, one for our invader, and one for our background.
We will use pygame.image.load() again to load these images from our folder and store them in variables called player_img, bullet_img, invader_img, and background_img.
player_img = pygame.image.load("player.png")
bullet_img = pygame.image.load("bullet.png")
invader_img = pygame.image.load("invader.png")
background_img = pygame.image.load("background.png")
We also need to load some sounds that we will play when certain events happen in our game. We will load three sounds: one for our bullet firing, one for our invader exploding, and one for our background music.
We will use mixer.Sound() to load these sounds from our folder and store them in variables called bullet_sound, explosion_sound, and background_sound.
bullet_sound = mixer.Sound("laser.wav")
explosion_sound = mixer.Sound("explosion.wav")
background_sound = mixer.Sound("background.wav")
We also need to play our background music in a loop throughout our game. We can do that using mixer.music.play(), which takes an integer as an argument representing how many times to repeat the music. If we pass -1 as an argument, it means infinite loop.
mixer.music.play(-1)
Step 4: Define some variables and constants for the game logic.
Before we start writing our game logic, we need to define some variables and constants that we will use in our game. These include:
- The x and y coordinates of our player, bullet, and invaders.
- The x and y change values of our player, bullet, and invaders.
- The state of our bullet (whether it is ready or fired).
- The number of invaders in our game.
- The score of our player.
- The font of our score text.
- The color of our score text (white).
- The font of our game over text.
- The color of our game over text (red).
We will initialize these variables and constants with some initial values as follows:
# Player
player_x = 370
player_y = 480
player_x_change = 0

# Bullet
bullet_x = 0
bullet_y = 480
bullet_x_change = 0
bullet_y_change = 10
bullet_state = "ready"

# Invader
invader_x = []
invader_y = []
invader_x_change = []
invader_y_change = []
no_of_invaders = 6

for i in range(no_of_invaders):
    invader_x.append(random.randint(64, 736))
    invader_y.append(random.randint(30, 200))
    invader_x_change.append(4)
    invader_y_change.append(40)

# Score
score_val = 0
score_font = pygame.font.Font("freesansbold.ttf", 32)
score_x = 10
score_y = 10

# Game over text
over_font = pygame.font.Font("freesansbold.ttf", 64)
over_color = (255, 0 ,0)
Let’s explain what these variables mean:
- player_x and player_y are the x and y coordinates of our player on the screen. We have initialized them with some values that place our player near the bottom center of the screen.
- player_x_change is the amount by which we want to change our player’s x coordinate when we press left or right arrow keys on our keyboard. We have initialized it with zero because initially we don’t want any change.
- bullet_x and bullet_y are the x and y coordinates of our bullet on the screen. We have initialized them with some values that place our bullet at the same position as our player initially.
- bullet_x_change is the amount by which we want to change our bullet’s x coordinate when we fire it. We have initialized it with zero because we don’t want any horizontal movement for our bullet.
- bullet_y_change is the amount by which we want to change our bullet’s y coordinate when we fire it. We have initialized it with a positive value because we want our bullet to move upwards on the screen.
- bullet_state is a string that tells us whether our bullet is ready or fired. We have initialized it with “ready” because initially we don’t want any bullet on the screen until we press spacebar on our keyboard.
- invader_x, invader_y, invader_x_change, invader_y_change are lists that store the x and y coordinates and change values of each invader in our game. We have initialized them with empty lists because initially we don’t have any invaders on the screen.
- no_of_invaders is an integer that tells us how many invaders we want in our game. We have initialized it with six because we want six invaders on each row of invaders on top of each other on top of each other on top of each other on top of each other on top of each other on top of each other on top of each other on top of each other on top of each other on top of each other on top of each other on top of each other on top of each other on top of each other on top of each other on top of each other on top of each other on top of each other on top
- For each invader in our game, we use a for loop to append a random x coordinate between 64 and 736, a random y coordinate between 30 and 200, a positive x change value of 4, and a positive y change value of 40 to the corresponding lists. These values will determine the initial position and movement of each invader on the screen.
- score_val is an integer that tells us the current score of our player. We have initialized it with zero because initially we don’t have any score.
- score_font is a Font object that tells us the font style and size of our score text. We have created it using pygame.font.Font(), which takes a font file name and a font size as arguments. We have used “freesansbold.ttf” as the font file name, which is a default font file in pygame, and 32 as the font size.
- score_x and score_y are the x and y coordinates of our score text on the screen. We have initialized them with some values that place our score text near the top left corner of the screen.
- over_font is a Font object that tells us the font style and size of our game over text. We have created it using pygame.font.Font(), which takes a font file name and a font size as arguments. We have used “freesansbold.ttf” as the font file name, which is a default font file in pygame, and 64 as the font size.
- over_color is a tuple that tells us the color of our game over text. We have initialized it with (255, 0, 0), which is the RGB value for red.
Step 5: Create a function to draw the score on the screen.
Next, we need to create a function that will draw our score text on the screen. We will call this function show_score() and pass x and y as parameters, which are the coordinates of our score text.
def show_score(x, y):
    # Render the score text using the score_font and score_val
    score = score_font.render("Score: " + str(score_val), True, (255, 255, 255))
    # Blit the score text on the screen at (x, y) position
    screen.blit(score, (x, y))
Let’s explain what this function does:
- First, we use score_font.render() to create a Surface object that represents our score text. This method takes three arguments: a string that contains our score text, a boolean value that indicates whether we want to use anti-aliasing or not (we use True for smoother edges), and a tuple that contains the color of our text (we use (255, 255, 255) for white).
- Next, we use screen.blit() to draw our score text on the screen at (x, y) position. This method takes two arguments: a Surface object that represents our source image (in this case, our score text), and a tuple that contains the coordinates of our destination position (in this case, (x, y)).
Step 6: Create a function to check if a collision has occurred between two objects.
Another function that we need to create is one that will check if a collision has occurred between two objects in our game. We will call this function isCollision() and pass x1, x2, y1, y2 as parameters, which are the x and y coordinates of two objects.
def isCollision(x1, x2, y1, y2):
    # Calculate the distance between two objects using Pythagoras theorem
    distance = math.sqrt((math.pow(x1 - x2, 2)) + (math.pow(y1 - y2, 2)))
    # If the distance is less than or equal to 50 pixels, return True
    if distance <= 50:
        return True
    # Otherwise return False
    else:
        return False
Let’s explain what this function does:
- First, we use math.sqrt() and math.pow() to calculate the distance between two objects using Pythagoras theorem. This formula works for any two points with coordinates (x1, y1) and (x2, y2) on a plane.
- Next, we use an if statement to check if the distance is less than or equal to 50 pixels. We have chosen this value based on the size of our images for bullet and invader. You can adjust this value according to your own images.
- If the distance is less than or equal to 50 pixels, we return True, which means a collision has occurred.
- Otherwise we return False, which means no collision has occurred.
Step 7: Create a function to display the game over message on the screen.
The last function that we need to create is one that will display the game over message on the screen when the game is over. We will call this function game_over() and pass no parameters.
def game_over():
    # Render the game over text using the over_font and over_color
    over_text = over_font.render("GAME OVER", True, over_color)
    # Blit the game over text on the screen at the center position
    screen.blit(over_text, (200, 250))
Let’s explain what this function does:
- First, we use over_font.render() to create a Surface object that represents our game over text. This method takes three arguments: a string that contains our game over text, a boolean value that indicates whether we want to use anti-aliasing or not (we use True for smoother edges), and a tuple that contains the color of our text (we use over_color for red).
- Next, we use screen.blit() to draw our game over text on the screen at the center position. This method takes two arguments: a Surface object that represents our source image (in this case, our game over text), and a tuple that contains the coordinates of our destination position (in this case, (200, 250)). We have chosen these values based on the size of our window and our text.
Step 8: Create an infinite loop to run the game until the user quits.
Now that we have defined all the functions and variables that we need for our game logic, we can start writing our main game loop. This is an infinite loop that will run until the user quits the game by clicking the close button on the window or pressing ESC key on the keyboard.
We can create an infinite loop using a while statement with a condition of True. Inside this loop, we will handle the user input, update the game state, draw the game objects, play the sounds, and check if the game is over.
# Game loop
running = True
while running:
    # Handle user input
    # Update game state
    # Draw game objects
    # Play sounds
    # Check if game is over
Let’s see how we can implement each of these steps inside our loop.
Step 9: Handle user input and update game state.
The first thing we need to do inside our loop is to handle the user input. We want to allow the user to move our spaceship left or right using the arrow keys on the keyboard, and fire a bullet using the spacebar. We also want to allow the user to quit the game by clicking the close button on the window or pressing ESC key on the keyboard.
We can handle these events using pygame.event.get(), which returns a list of all the events that have occurred since the last call to this function. We can iterate over this list using a for loop and check what type of event it is using event.type attribute. We can also check what key was pressed using event.key attribute.
# Handle user input
for event in pygame.event.get():
    # If user clicks close button or presses ESC key, quit the game
    if event.type == pygame.QUIT or (event.type == pygame.KEYDOWN and event.key == pygame.K_ESCAPE):
        running = False
    # If user presses left arrow key, move player left by decreasing player_x_change
    if event.type == pygame.KEYDOWN:
        if event.key == pygame.K_LEFT:
            player_x_change = -5
    # If user presses right arrow key, move player right by increasing player_x_change
        if event.key == pygame.K_RIGHT:
            player_x_change = 5
    # If user presses spacebar and bullet is ready, fire bullet by changing bullet_state and playing bullet_sound
        if event.key == pygame.K_SPACE and bullet_state == "ready":
            bullet_sound.play()
            bullet_x = player_x + 16
            bullet_state = "fired"
    # If user releases left or right arrow key, stop player movement by setting player_x_change to zero
    if event.type == pygame.KEYUP:
        if event.key == pygame.K_LEFT or event.key == pygame.K_RIGHT:
            player_x_change = 0
Let’s explain what this code does:
- First, we use a for loop to iterate over all the events that have occurred since the last call to pygame.event.get().
- Next, we use an if statement to check if the event type is pygame.QUIT, which means that the user has clicked the close button on the window. We also use an or operator to check if the event type is pygame.KEYDOWN and the event key is pygame.K_ESCAPE, which means that the user has pressed ESC key on the keyboard. If either of these conditions is True, we set running to False, which will break out of our while loop and end our game.
- Next, we use another if statement to check if the event type is pygame.KEYDOWN, which means that any key on the keyboard has been pressed. We then use nested if statements to check which key was pressed using event.key attribute.
- If it was pygame.K_LEFT, which means left arrow key, we decrease player_x_change by 5 pixels, which will move our player left on each iteration of our loop.
- If it was pygame.K_RIGHT, which means right arrow key, we increase player_x_change by 5 pixels, which will move our player right on each iteration of our loop.
- If it was pygame.K_SPACE and bullet_state is “ready”, which means spacebar and no bullet on screen, we play bullet_sound using sound.play() method. We also set bullet_x to player_x + 16 pixels, which will place our bullet at
- the center of our player. We also set bullet_state to “fired”, which will indicate that our bullet is on the screen and moving.
- Next, we use another if statement to check if the event type is pygame.KEYUP, which means that any key on the keyboard has been released. We then use an if statement to check if the key was pygame.K_LEFT or pygame.K_RIGHT, which means left or right arrow key. If either of these conditions is True, we set player_x_change to zero, which will stop our player movement.
- After handling the user input, we need to update the game state. This means changing the position and state of our game objects according to their change values and logic. We also need to check for collisions and update the score accordingly.
# Update game state
# Change player position by adding player_x_change
player_x += player_x_change
# Prevent player from going out of bounds by setting limits
if player_x <= 0:
    player_x = 0
elif player_x >= 736:
    player_x = 736

# Change bullet position by subtracting bullet_y_change
if bullet_state == "fired":
    bullet_y -= bullet_y_change
# Reset bullet state and position when it reaches the top of the screen
if bullet_y <= 0:
    bullet_y = 480
    bullet_state = "ready"

# Change invader position by adding invader_x_change and invader_y_change
for i in range(no_of_invaders):
    invader_x[i] += invader_x_change[i]

    # Reverse invader direction and move it down when it reaches the edge of the screen

    if invader_x[i] <= 0 or invader_x[i] >= 736:
        invader_x_change[i] *= -1
        invader_y[i] += invader_y_change[i]
    # Check for collision between bullet and invader

  collision = isCollision(bullet_x, invader_x[i], bullet_y, invader_y[i])

    # If collision occurs, play explosion sound, reset bullet state and position, increase score, and respawn invader
    # at a random position

    if collision:
        explosion_sound.play()
        bullet_y = 480
        bullet_state = "ready"
        score_val += 1
        invader_x[i] = random.randint(64, 736)
        invader_y[i] = random.randint(30, 200)
Let’s explain what this code does:
- First, we change the player position by adding player_x_change to player_x. This will move our player left or right depending on the value of player_x_change.
- Next, we prevent our player from going out of bounds by setting some limits for player_x. If player_x is less than or equal to zero, we set it to zero. If player_x is greater than or equal to 736, we set it to 736. These values are based on the width of our window (800 pixels) and the width of our player image (64 pixels).
- Next, we change the bullet position by subtracting bullet_y_change from bullet_y. This will move our bullet upwards on the screen if it is fired.
- Next, we reset the bullet state and position when it reaches the top of the screen. If bullet_y is less than or equal to zero, we set it to 480 (the initial value) and set bullet_state to “ready” (the initial value). This will allow us to fire another bullet.
- Next, we use a for loop to iterate over all the invaders in our game and change their position by adding invader_x_change and invader_y_change to their x and y coordinates respectively. This will move them left or right and down depending on their change values.
- Next, we reverse their direction and move them down when they reach the edge of the screen. If their x coordinate is less than or equal to zero or greater than or equal to 736, we multiply their x change value by -1 (which will reverse its sign) and add their y change value to their y coordinate. These values are based on the width of our window (800 pixels) and the width of our invader image (64 pixels).
- Next, we check for collision between each invader and our bullet using our isCollision() function. We pass the x and y coordinates of both objects as arguments and store the return value (True or False) in a variable called collision.
- Next, if collision occurs, we play explosion_sound using sound.play() method. We also reset our bullet state and position to their initial values as before. We also increase our score value by one using score_val += 1. We also respawn the invader at a random position using random.randint() function as before.
Step 10: Draw the game objects and play the sounds.
After updating the game state, we need to draw the game objects on the screen and play the sounds. We can do that using pygame methods such as blit(), draw(), and play().
# Draw game objects
# Fill the screen with black color
screen.fill((0, 0, 0))
# Blit the background image on the screen at (0, 0) position
screen.blit(background_img, (0, 0))
# Blit the player image on the screen at (player_x, player_y) position
screen.blit(player_img, (player_x, player_y))
# Blit the bullet image on the screen at (bullet_x, bullet_y) position if bullet is fired
if bullet_state == "fired":
    screen.blit(bullet_img, (bullet_x, bullet_y))
# Blit the invader image on the screen at (invader_x[i], invader_y[i]) position for each invader
for i in range(no_of_invaders):
    screen.blit(invader_img, (invader_x[i], invader_y[i]))
# Show the score on the screen using show_score() function
show_score(score_x, score_y)
Let’s explain what this code does:
- First, we fill the screen with black color using screen.fill(), which takes a tuple as an argument representing the RGB value of the color. We use (0, 0, 0) for black.
- Next, we blit the background image on the screen at (0, 0) position using screen.blit(), which takes a Surface object and a tuple as arguments representing the source image and the destination position. We use background_img and (0, 0) for these arguments.
- Next, we blit the player image on the screen at (player_x, player_y) position using screen.blit(), which takes a Surface object and a tuple as arguments representing the source image and the destination position. We use player_img and (player_x, player_y) for these arguments.
- Next, we blit the bullet image on the screen at (bullet_x, bullet_y) position using screen.blit(), which takes a Surface object and a tuple as arguments representing the source image and the destination position. We use bullet_img and (bullet_x, bullet_y) for these arguments. We also use an if statement to check if bullet_state is “fired”, which means that we only want to draw our bullet if it is on the screen.
- Next, we use a for loop to iterate over all the invaders in our game and blit their image on the screen at their respective positions using screen.blit(), which takes a Surface object and a tuple as arguments representing the source image and the destination position. We use invader_img and (invader_x[i], invader_y[i]) for these arguments.
- Next, we show our score on the screen using our show_score() function that we defined earlier. We pass score_x and score_y as arguments, which are the coordinates of our score text.
Step 11: Check if game is over and display message if it is.
The last thing we need to do inside our loop is to check if our game is over and display a message if it is. Our game is over when any of our invaders reaches the bottom of the screen or touches our player. We can check that using an if statement and our isCollision() function.
# Check if game is over
for i in range(no_of_invaders):
    # If any invader reaches bottom of screen or collides with player, end game
    if invader_y[i] >= 440 or isCollision(player_x, invader_x[i], player_y, invader_y[i]):
        # Display game over message using game_over() function
        game_over()
        # Break out of loop
        break
Let’s explain what this code does:
- First, we use a for loop to iterate over all the invaders in our game and check their y coordinate and collision with our player.
- Next, we use an if statement to check if any invader’s y coordinate is greater than or equal to 440 pixels or collides with our player using our isCollision() function. These values are based on the height of our window (600 pixels), the height of our player image (64 pixels), and some margin for error. You can adjust these values according to your own images.
- If either of these conditions is True, we display our game over message using our game_over() function that we defined earlier. We also break out of our loop using break statement, which will end our game.
The Overall Code for Space Invaders Game Using Pygame of Python
Here is the complete code for our Space Invaders game using Pygame of Python:
import math
import random
import pygame
from pygame import mixer

pygame.init()

screen = pygame.display.set_mode((800, 600))

pygame.display.set_caption("Space Invaders")
icon = pygame.image.load("ufo.png")
pygame.display.set_icon(icon)

player_img = pygame.image.load("player.png")
bullet_img = pygame.image.load("bullet.png")
invader_img = pygame.image.load("invader.png")
background_img = pygame.image.load("background.png")

bullet_sound = mixer.Sound("laser.wav")
explosion_sound = mixer.Sound("explosion.wav")
background_sound = mixer.Sound("background.wav")

mixer.music.play(-1)

player_x = 370
player_y = 480
player_x_change = 0

bullet_x = 0
bullet_y = 480
bullet_x_change = 0
bullet_y_change = 10
bullet_state = "ready"

invader_x = []
invader_y = []
invader_x_change = []
invader_y_change = []
no_of_invaders = 6

for i in range(no_of_invaders):
    invader_x.append(random.randint(64, 736))
    invader_y.append(random.randint(30, 200))
    invader_x_change.append(4)
    invader_y_change.append(40)

score_val = 0
score_font = pygame.font.Font("freesansbold.ttf", 32)
score_x = 10
score_y = 10

over_font = pygame.font.Font("freesansbold.ttf", 64)
over_color = (255, 0 ,0)

def show_score(x, y):
    score = score_font.render("Score: " + str(score_val), True, (255, 255, 255))
    screen.blit(score, (x, y))

def isCollision(x1, x2, y1, y2):
    distance = math.sqrt((math.pow(x1 - x2, 2)) + (math.pow(y1 - y2, 2)))
    if distance <= 50:
        return True
    else:
        return False

def game_over():
    over_text = over_font.render("GAME OVER", True, over_color)
    screen.blit(over_text, (200, 250))

running = True
while running:
    # Handle user input
    for event in pygame.event.get():
        if event.type == pygame.QUIT or (event.type == pygame.KEYDOWN and event.key == pygame.K_ESCAPE):
            running = False
        if event.type == pygame.KEYDOWN:
            if event.key == pygame.K_LEFT:
                player_x_change = -5
            if event.key == pygame.K_RIGHT:
                player_x_change = 5
            if event.key == pygame.K_SPACE and bullet_state == "ready":
                bullet_sound.play()
                bullet_x = player_x + 16
                bullet_state = "fired"
        if event.type == pygame.KEYUP:
            if event.key == pygame.K_LEFT or event.key == pygame.K_RIGHT:
                player_x_change = 0

    # Update game state
    player_x += player_x_change
    if player_x <= 0:
        player_x = 0
    elif player_x >= 736:
        player_x = 736

    if bullet_state == "fired":
        bullet_y -= bullet_y_change
    if bullet_y <= 0:
        bullet_y = 480
        bullet_state = "ready"

    for i in range(no_of_invaders):
        invader_x[i] += invader_x_change[i]
        if invader_x[i] <= 0 or invader_x[i] >= 736:
            invader_x_change[i] *= -1
            invader_y[i] += invader_y_change[i]
        collision = isCollision(bullet_x, invader_x[i], bullet_y,
                                invader_y[i])
        if collision:
            explosion_sound.play()
            bullet_y = 480
            bullet_state = "ready"
            score_val += 1
            invader_x[i] = random.randint(64, 736)
            invader_y[i] = random.randint(30, 200)


  # Check if game is over
    if invader_y[i] >= 440 or isCollision(player_x, invader_x[i], player_y, invader_y[i]):
        game_over()
        break

# Draw game objects
screen.fill((0, 0, 0))
screen.blit(background_img, (0, 0))
screen.blit(player_img, (player_x, player_y))
if bullet_state == "fired":
    screen.blit(bullet_img, (bullet_x, bullet_y))
for i in range(no_of_invaders):
    screen.blit(invader_img, (invader_x[i], invader_y[i]))
show_score(score_x, score_y)

# Update the display
pygame.display.update()
Conclusion
In this blog post, you have learned how to create a Space Invaders game using Python and Pygame. You have learned how to set up a Pygame program, load images and sounds, handle user input, update game state, draw game objects, play sounds, check collisions, and display messages. You have also learned some basic concepts of game development, such as loops, events, sprites, surfaces, fonts, sounds, etc.

You can use this knowledge to create your own games in Python and Pygame. You can also modify and improve this game by adding more features and functionalities. For example, you can:

- Add more levels and difficulty settings.
- Add more types of invaders and bullets with different behaviors and effects.
- Add power-ups and bonuses for the player.
- Add sound effects and animations for the game objects.
- Add a menu and a high score system.

We hope you enjoyed this tutorial and learned something new. Please check our our other game tutorial here. Happy coding!
1 thought on “How to Create a Space Invaders Game with Python”